You may or may not know; in addition to being a commercial and event photographer and corporate film-maker, I also own a Photo Booth company (PartyBoothNW – also on Facebook) and am a whisk(e)y educator, blogger and podcast producer. Sometimes I cross-pollinate a little and get to take photos for one of these other ventures. Which lead me to this.
My podcast (The Whisky Guy) is a weekly delve into the wide spectrum of whisk(e)y; production, history, culture, lifestyle, cocktails and more, surrounding Scotch, Irish, Canadian, Bourbon, Indian, Japanese and Korean whiskies, and beyond. In addition to featuring an interview with an industry leader, I also include the tasting notes of a whisk(e)y and a photo to go along with it. For the episode that launched on Whisky Wednesday, May 15, 2014, I tasted Yamazaki 18 year – a Single Malt Japanese Whisky.
Photography is not the focus of the podcast – whisk(e)y is, so I don’t want to spend too much time on the photo. I’ve set-up a mini-studio with 2 speedlights (Nissin Di622 MKII-N), one with a LumiQuest Ultrasoft and one with a Rogue Flashbender, one with a PocketWizard (Plus II on the strobe and a Plus III on the camera) and one set to optically slave. The product is set on a Modahaus Tabletop Studio 216 (Thanks Kate!) and I shoot these with a Panasonic Lumix GX7 with the kit lens. The whole thing is set-up on my dining room table in less than 5 minutes, and less than 5 minutes after that I’m into Lightroom for editing, and less than 5 minutes after that I have the finished shot that will be used in the podcast show notes. So, how does the final image come together?
-
Step 1: Have a Plan!
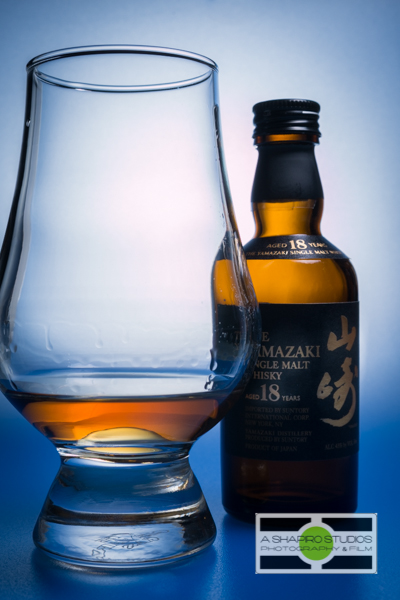
Walking into the studio and having no idea what you plan to do is a recipe for disaster. You’ll waste time and energy and (likely) be unhappy with your results. Start with your vision – what’s important in the shot? What are you trying to highlight? What’s important? What tells the story? For this shot I wanted to feature the color of the liquid and the age statement of the whisky.
-
Step 2: The Set-Up
The color of the whisky led me to the blue background; the complimentary color made the amber of the whisky pop even more. I wanted a bright spot behind the glass and bottle to showcase the clarity of the glass and bottle, so the second strobe was positioned about 18″ behind the background with the flashbender. I was going for a bit more of a dramatic look – really highlighting the Kanji and age statement on the bottle, so I put the primary strobe almost 60deg off-axis (camera right) and probably 75deg above using a Gorillapod, really close to the product.
-
Step 3: Test Shots
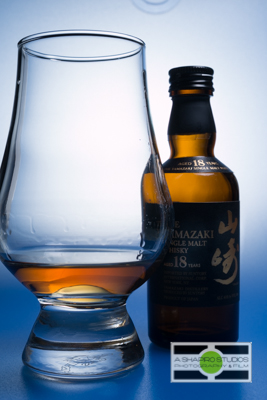
After setting everything up I fired off a couple shots, but decided I wasn’t happy with the bottle to the left of the glass in the frame. I couldn’t see enough of the label and wasn’t getting enough light on the age statement. I recomposed and got 3 more shots.
-
Step 4: Review
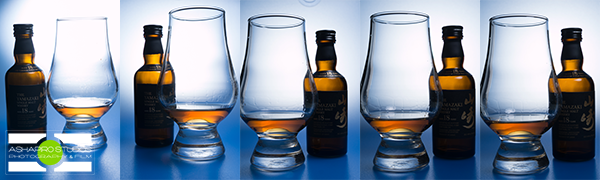
During capture I played with camera elevation, exposure, how the bottle was turned… lots of options. Also, I was hand-held on the camera, so didn’t really have the chance to ‘dial it in.’ Opening all the photos in Lightroom, the middle photo of the set started to stand out. The light on the ’18’ on the neck, the lighter blue in the foot of the glass, the reflection of the background in the surface of the liquid… but it had some problems.
-
Step 5: Post-Processing
Out of camera, I realized the glass… wasn’t as clean as it should have been. It’s a little crooked and… what is that on the background? Also, the primary label didn’t quite get enough light.
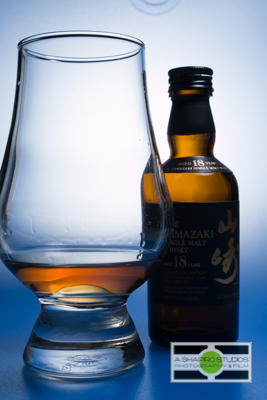
Lets start with the exposure issues and straighten it a little. Brighten the main label, some contrast on the neck and give just a little brightness to the foil up top.
Next – I need to take care of that thing on the background. No idea what it was – I’ll wonder about it forever. There’s even a chance it was the wrist strap from the Pocketwizard dangling in front of the lens. No matter, clone it out. Lets do a little color adjustment while we’re at it to really show that blue and clean up the gradient from blue to white on the background so it’s not so harsh. Brighten up the liquid just a touch, and the brown bottle, and we’re almost there.
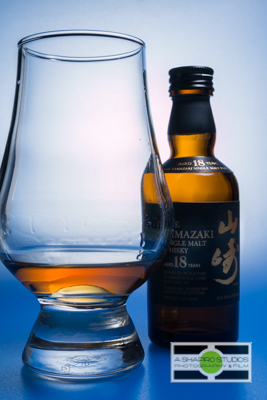
Finally, the light behind the background also gave me a bit of a natural gradient, but I wanted to enhance that even more. Some sharpening, some contrast, and here’s the final image – ready for its close-up!
Like I said, the whole thing took me less than 15 minutes using some very simple tools. Want to learn more about how to make shots like this? Join me for my Table Top Product Photography Workshop on May 22 – And keep making great photos!