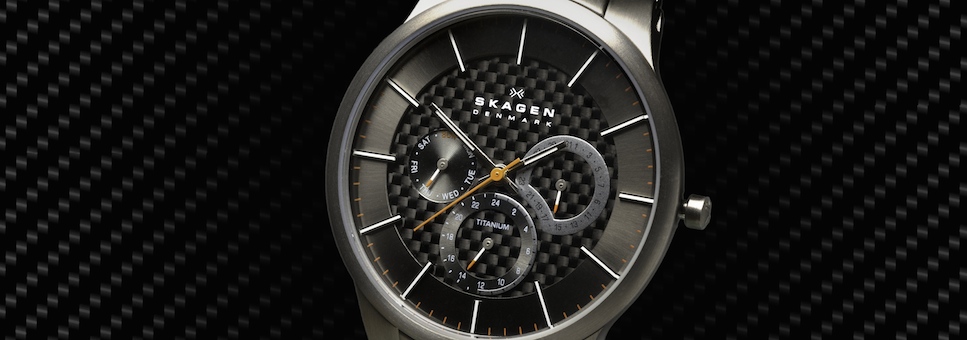
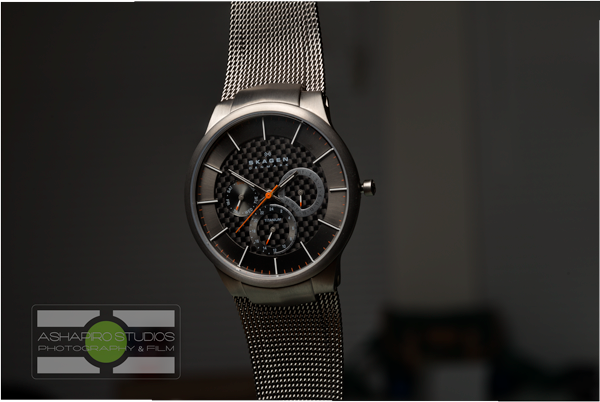
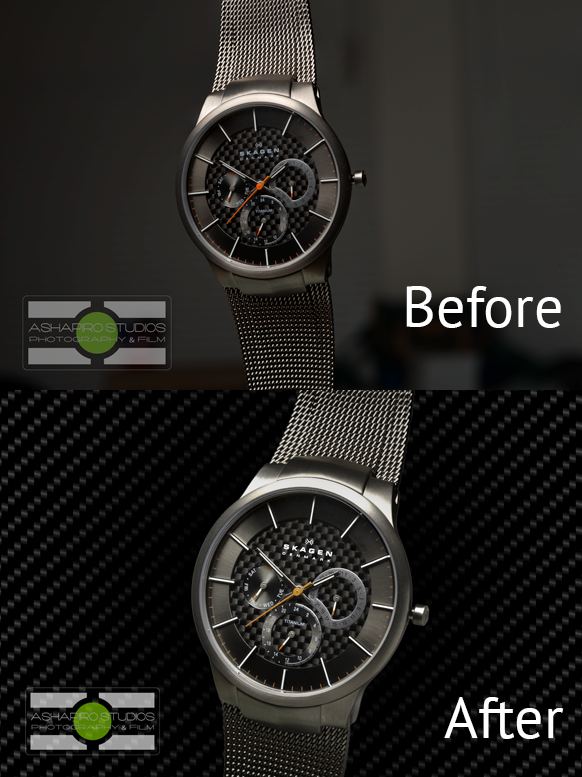
I saw it – I loved it – I wanted to take a picture of it. The mesh strap, the carbon fiber background, the small pops of color on this Skagen Watch… Yeah, let’s do this.

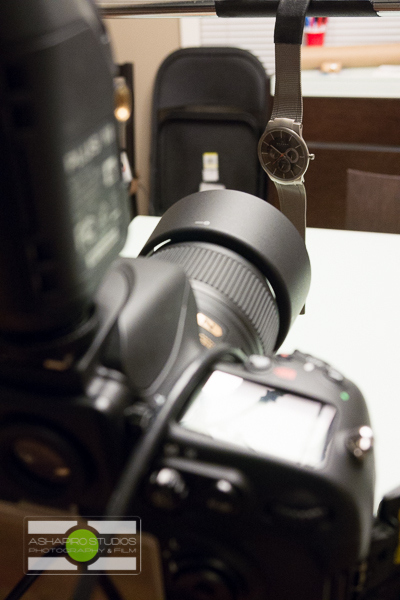
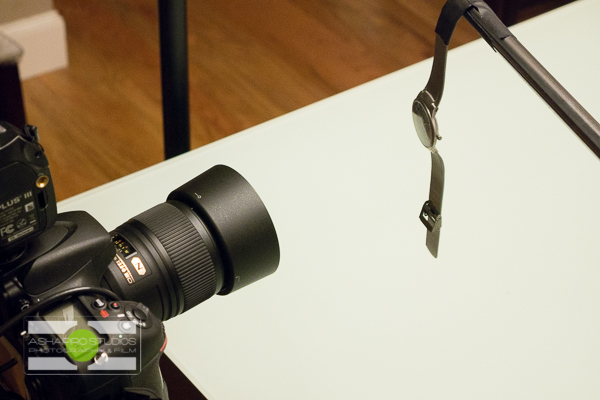
First, let’s talk set-up. I really wanted to go minimal on this one. 1 light, no special equipment, kitchen table, etc. A full equipment list is below, but in short – A boom arm on a light stand, a speed light and soft box, a camera and lens and a small reflector, all set around my dining room table. The watch was gaff taped to the arm, hanging, and the softbox was high and left of camera.

One of the big tricks with shooting this close up is that even at smaller apertures you still need to focus stack – a technique for another post. Since I planned to take as much care with this as I would any other commercial image, I wanted to keep every portion of the watch in tack-sharp focus. Focus stacking is the way!
Step 1: Take lots of pictures. It’s of the utmost importance that you not move the camera or the subject; in this case, the watch. Everything has to line-up later. I had metered my light and had taken a couple test shots to make sure I had the right reflections and specular highlights, and the watch/camera were in the right position. With the vision in my head of what I wanted the shot to look like, I shot up just slightly on the watch. I shot different focus areas (for the stacking), held a reflector in different positions to catch angles on the watch – over 40 exposures in all.
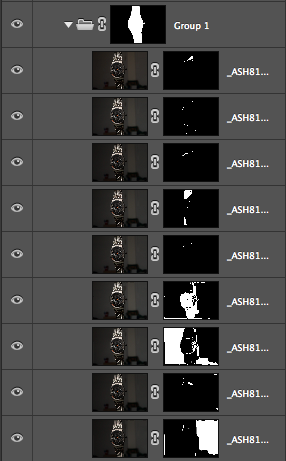
Through the lens, even with the overhead room light off, there was some over spray onto the window blinds behind the watch so step 2 was to isolate the watch. Even being as careful as possible to not move the camera or watch, there’s always a chance something jostled so after importing the images through Adobe Lightroom and importing as layers into Photoshop, I Auto-Aligned layers. For one of my exposures, I held a grey card behind the watch which let me grab a clean path and isolate the watch.

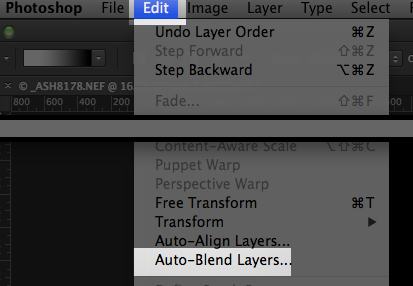
Next was to use all the focus point exposures. Photoshop has a nifty tool for focus stacking – Auto-Blend Layers. I chose a selection of layers that represented different focus points, ran that, then grouped them and masked using the selection from earlier.
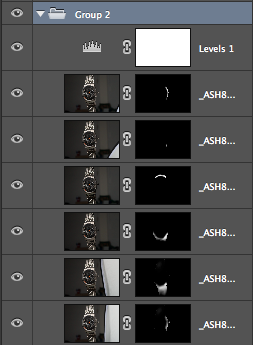
Next up was a Levels adjustment layer, followed by masking in the exposures with the reflector – bringing in light to different angles.
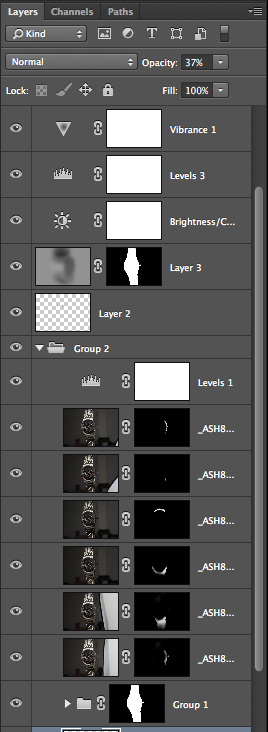
After grouping all of that together I was ready for some retouching. The file was already really big and I didn’t need to make it any larger, so I opted to use the healing brush exclusively on a blank layer, using ‘sample all layers.’ A Dodge and Burn, Brightness, Levels and Brightness layer later, I had a finished watch… but that wasn’t the concept.
Looking at the watch, one of the things that really struck me was the carbon fiber background, and I wanted to play off that. The background had some Levels adjustments to give a black hole in the center and a little vignette around the outside. Drop the watch on, free transform into position, et voila! The Skagen Titanium Grey Multifunction Watch (Model number 809XLTTM).
People tell me all the time that they don’t know what to take pictures of. The reality is that we’re surrounded by great photographic fodder, but most important is to shoot was inspires you, like the carbon fiber background of your wristwatch. Don’t forget to *Like* AShapiro Studios on Facebook and *Follow* us on Twitter and Instagram. Now go out and make great photos!
Equipment List:
Nikon D800
Nikon MC-30 Remote
Nikkor 60mm f/2.8 Macro
PocketWizard Plus II & III
Nissin Di622 Mark II
Wescott Apollo Medium
Manfrotto 5001B
Westcott 10′ Lightstand
Avenger D520 Arm
Lastolite EzyBalance
Vanguard Alta 283CT
Vanguard SBH 200